
How to Setup iPad Pro for Data Science / Machine Learning Development - Part 2: Enable File Management Interface and Jupyter / Python IDE
Introduction
This is Part 2 of my iPad Pro for Data Science Development series. If you haven’t already, you can visit other parts of this series below:
In this tutorial, I will walk you through the following 2 topics:
- How to enable a “File Manager”-like application that connects the cloud instance via SFTP using FTP-Manager Pro. You can certainly use any iPad app that supports SFTP protocal, for instance, apps listed here
- How to install and run a Jupyter Hub server on the cloud instance and access via Safari on iPad Pro. Alternatively, I will also introduce the use of Juno Connect app to connect to a cloud instance hosted Jupyter Notebook server via SSH Tunneling.
Pre-requisites
In order to complete this setup, you will need to be comfortable with the following factors:
- You need to be able to maintain constant Internet access for your iPad Pro
- You’ll need to have a little bit of understanding on how to run
bashcommand / scripts, since most of cloud instance uses Linux OS - You can expect paying monthly around one to three cups of latte (5 - 15 USD) for the convenience of running an always-on cloud instance from your mobile device. Maybe consider canceling a few of the monthly subscriptions on apps to make room for this budget.
How to Set Up File Manager with Cloud Instance
Using the File Manager app, you should be able to freely upload / download files from your iPad Pro local disk, external drives, or cloud drives using iPadOS’s amazing drag and drop capability. This will make your iPad Pro cloud computing solution more similar to what a FileZilla app on laptop can provide! In this guide, I will demonstrate the process using FTP-Manager Pro.
- First, you need to have a running cloud instance runninng and a working SSH connection. If not available yet, follow my Part 1 tutorial to set up your cloud instance and SSH connection
- Fire up your FTP Manager Pro app. On the sidebar, click on the “+” sign to create a new connection. Select “SFTP” from the list. You should see an interface like below:

-
Enter an alias of your choice for the connection for
Display Namefield. Key in the IPv4 address of your cloud instance toHost Name/IPfield. ThePortshould be optional. ThePathwill be the “pwd” when you connected to the server; I entered/home/for this. UnderCONNECT AS, if your cloud instance only allow for SSH connections, selectKey fileforLogon Type, create a text file containing your private key text in your iPad Pro’s local drive, and select the file forPrivate key file; if you have defined a key passphrase when generating the SSH key, then enter the passphrase toPrivate key passphrasefield. If your cloud instance allow for connection with username and password, selectNormalforLogon Typeand type in your information. -
Once you saved your connection settings, you should be able to connect to your cloud instance without any problems! The FTP Manager Pro app allows for drag and drop operations with Apple’s Files app, so you can just arrange your files as if it is on the same computer!
How to Run and Access Jupyter Notebook / Jupyter Lab
As a data scientist, Jupyter Notebook / Jupyter Lab is an absolute need for daily work. I will demonstrate 2 possible methods to run Jupyter Notebook.
Method 1: Running Jupyter Hub Server on Cloud Instance
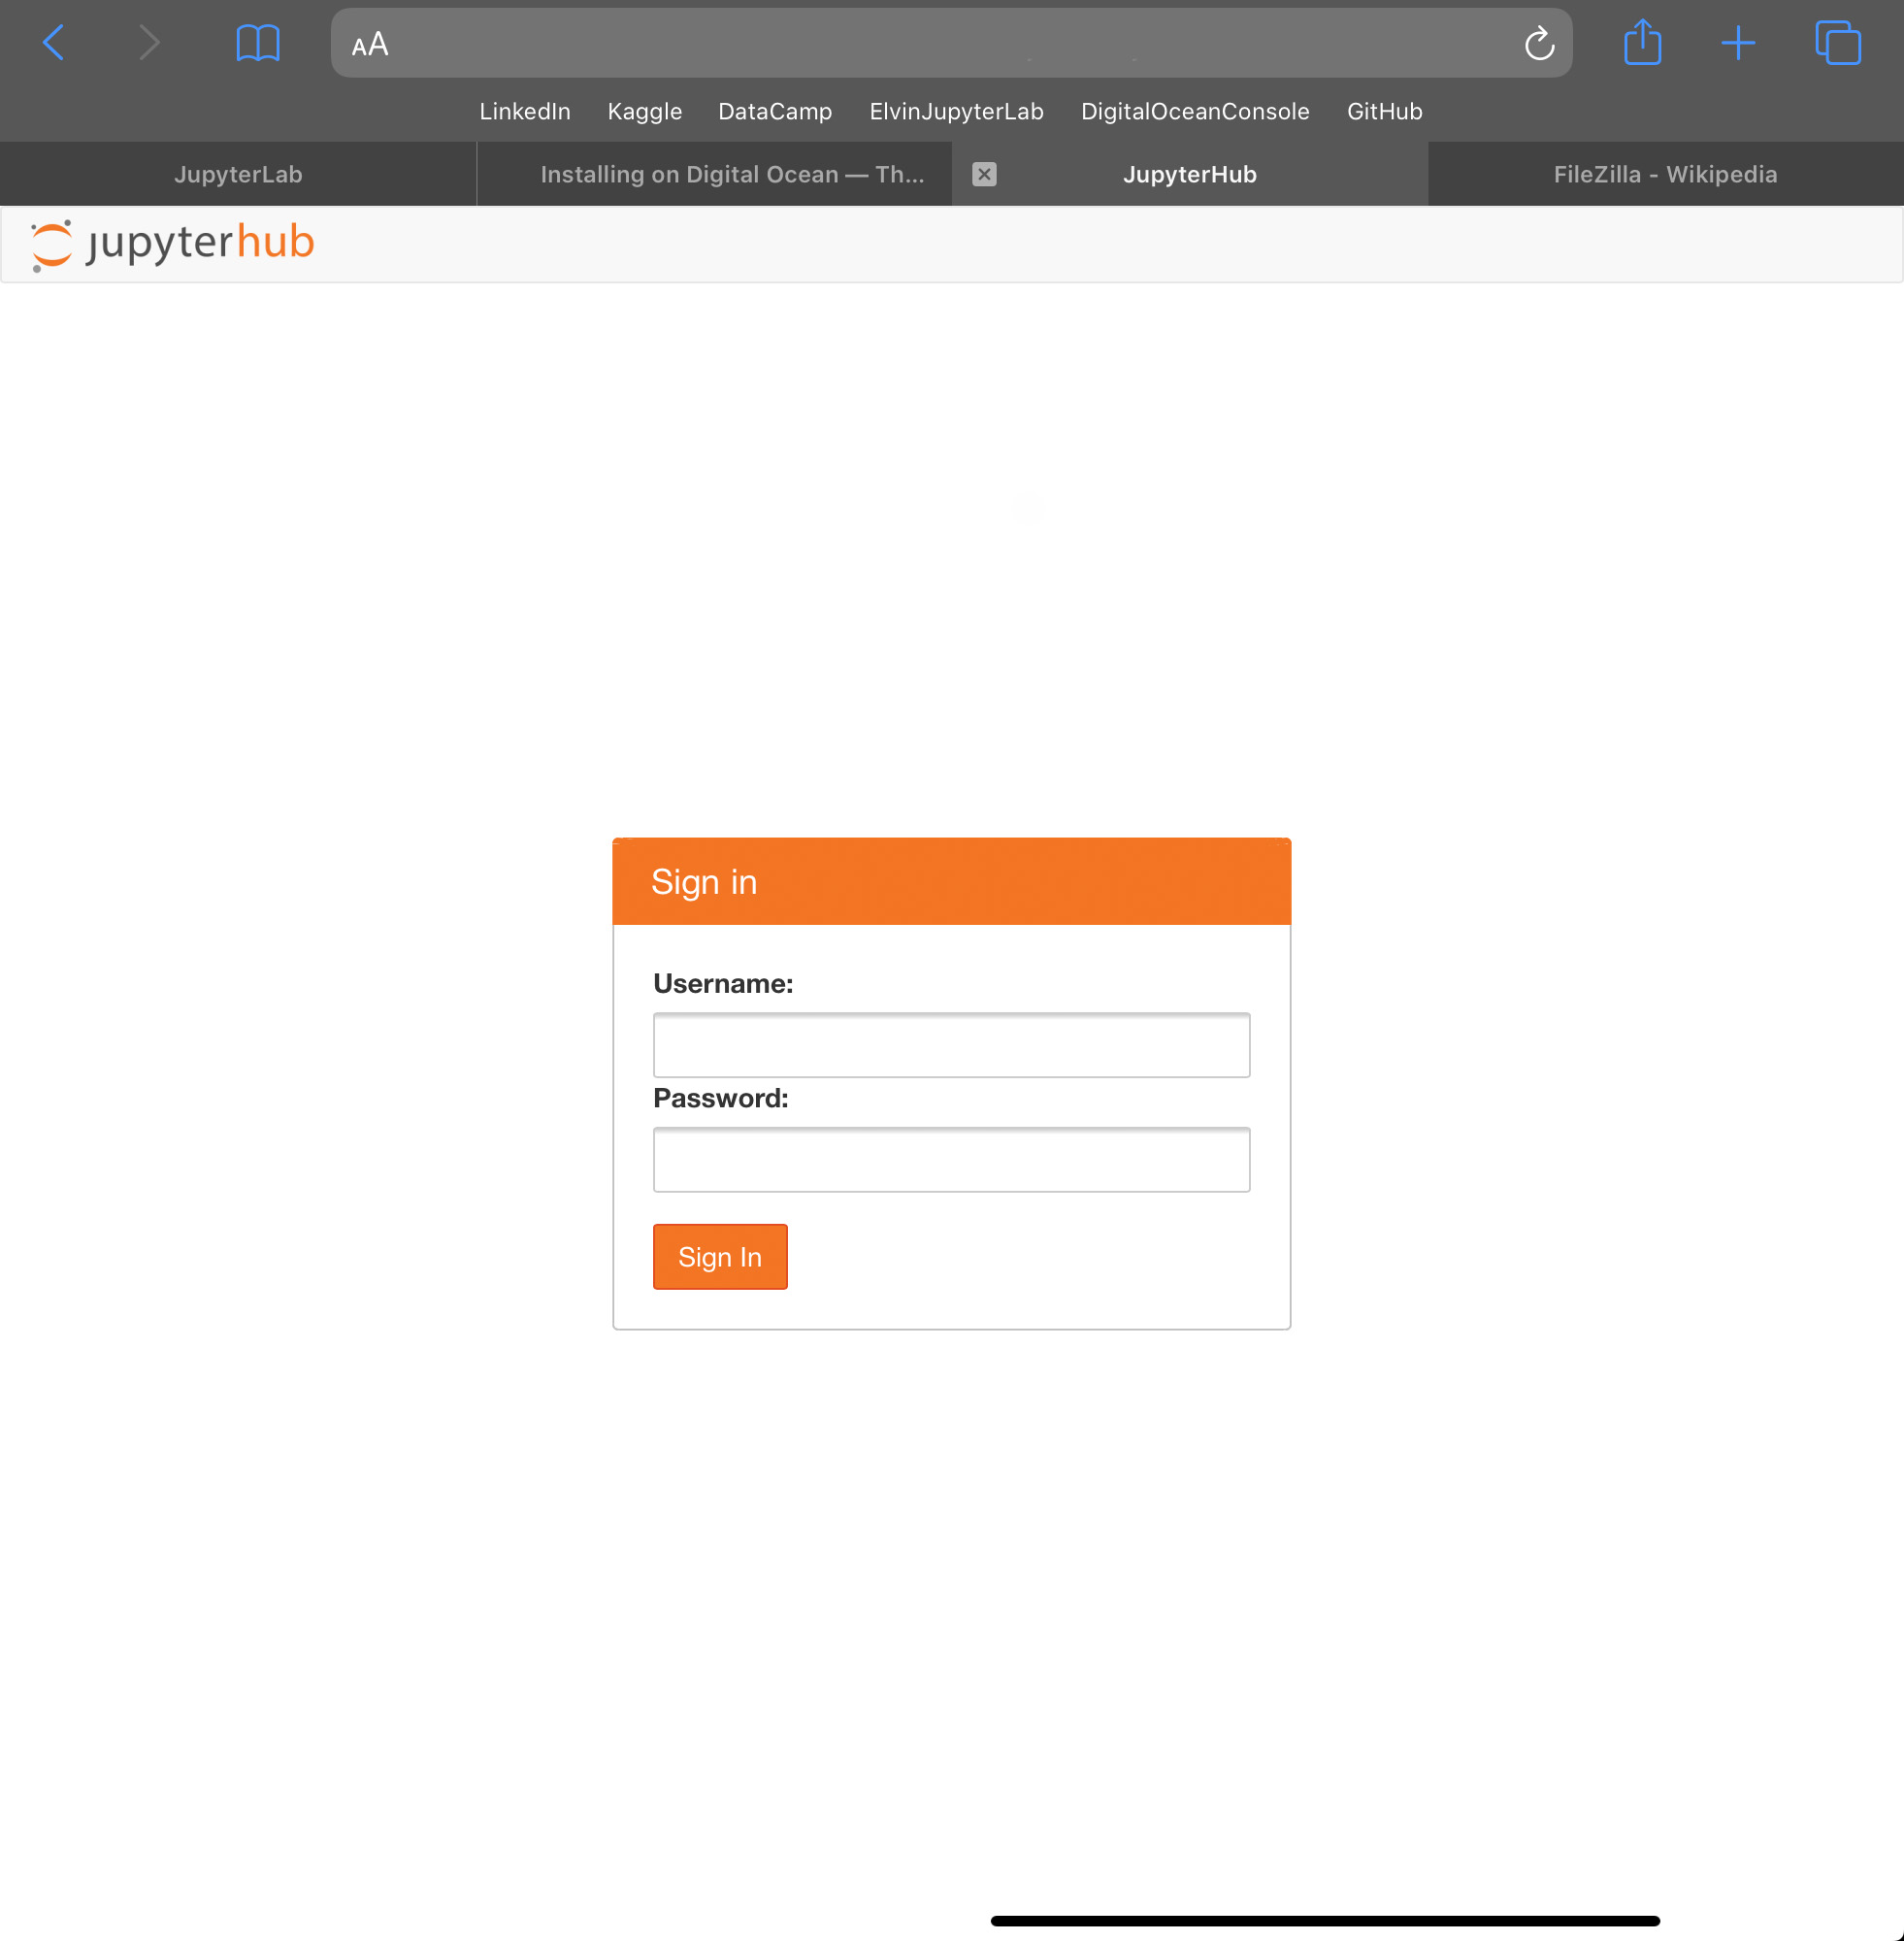
After extensive research on the open source space as of April, 2020, I identified the Littlest Jupyter Hub as the best Jupyter Notebook server with extensive tutorial and least complex setup process. Just follow Jupyter Hub’s Official Guidance to Install on Digital Ocean here to create your own instance; be aware that you will need to create a brand new droplet by following this tutorial. However, the upside is that you can directly access your Jupyter Hub instance via the cloud instance’s IPv4 address from the Safari / Chrome browser, with an interface like below:
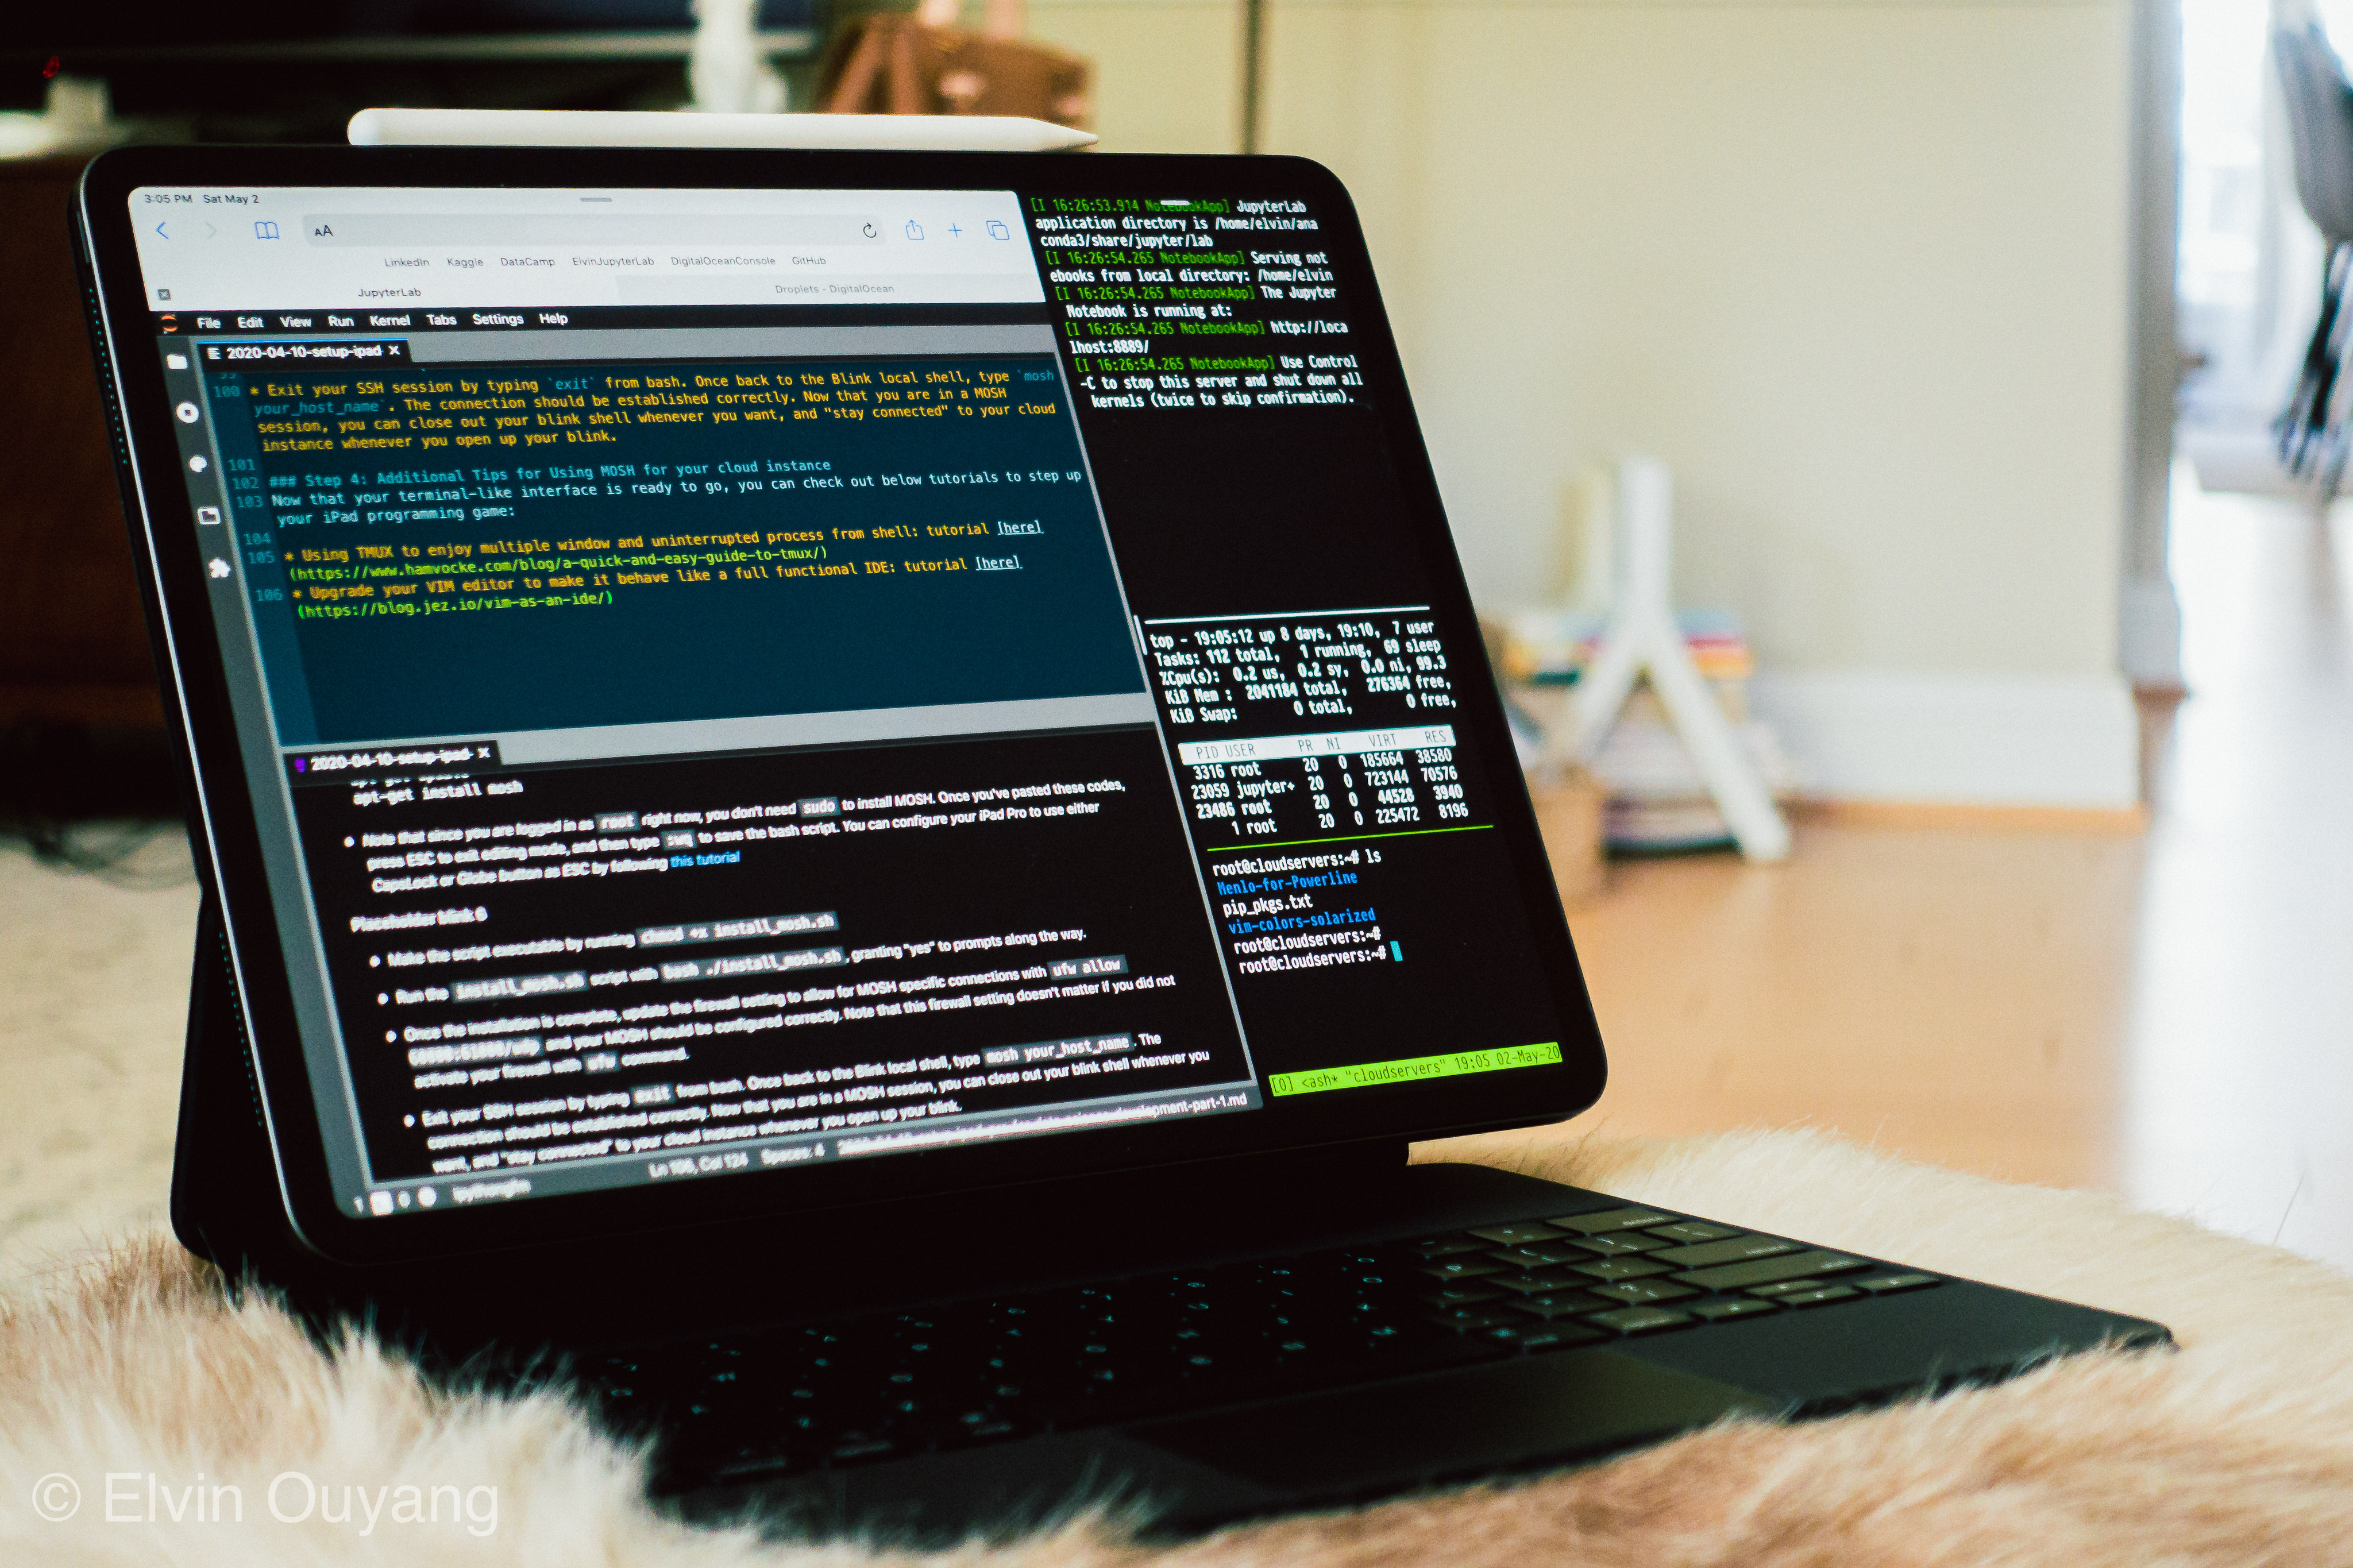
Once you log in to the Jupyter Hub, you should be seeing the familiar interface of Jupyter Notebook. If you prefer to switch to the Jupyter Lab interface (what I demonstrated in the photo of my iPad Pro at the top of this post), follow the tutorial here.
Method 2: Access Jupyter Notebook with Juno Connect app via SSH tunneling
The alternative method is to use the Juno Connect app as a local SSH port forwarding software that connects to a Jupyter Notebook server remotely via SSH. Notice that this method requires a standard Jupyter Notebook service running on your cloud instance. Follow below steps:
- Once you SSH’ed / MOSH’ed into your cloud instance, you would need to create a new
sudouser, since Anaconda does not recommend installing asroot. Runadduser new_user_nameto craete a new user. Modify the new user by adding it tosudogroup via runningusermod -aG sudo new_user_name. Switch to the new user via runningsu - new_user_nameand then test ifsudoworks correctly via runningsudo whoami. Check out this tutorial for more detailed guidance. - Now that you have a new
sudouser, switch to that user by runningsu - new_user_name. Follow Anaconda’s official guidance to install an Anaconda python. - (Optional) If you need to enable a user password for your Jupyter Notebook instance, run
jupyter notebook password. The system will prompt you for new password and then save it in hashed format. - Follow Juno Connect’s official tutorial to connect your app to the cloud instance. You can run the
tmuxfrom shell to host the juptyer lab in a detached shell session, such that you can run other things in your command line while your Jupyter Notebook runs in the background.
After using both methods to connect to my Jupyter Notebook, I actually preferred the Jupyter Hub approach for following reasons:
- Jupyter Lab interface is accessible via Jupyter Hub approach, while Juno Connect only follows the Jupyter Notebook layout
- You will be able to edit non-Python text files (such as Markdown and bash script) in Jupyter Hub with a more traditional IDE feel. Currently, Juno Connect does not support text editing functionality, although I think text editing support is on its way
- You can even allow multiple users, such as your classmates or Kaggle teammates, to register their own account to your Jupyter Hub server and then to split up the costs of cloud computing
However, Juno Connect will be handy in some other scenarios, such as when you need a temporary boost of computing resource (more CPU/RAM or even GPUs for Deep Learning, for instance), since it allows you to connect to dedicated Jupyter Notebook servers like Microsoft Azure Notebooks or free Jupyter Notebook servers like Binder.org without having to go through all the cloud computing set-up process.


Leave a Comment